Continuous integration and deployment for your SharePoint Framework solutions
In case you missed my previous article you can go here "Automated deployment of your SharePoint Framework solution on Office 365 CDN". In this article I'd like to extend this topic, showing how to configure the continuous integration and deployment through Visual Studio Team Services for a SharePoint Framework solution.
As I mentioned in my previous article there are two Powershell scripts in order to upload the bundle on Office 365 CDN and the solution’s package into the App Catalog, additionally, I added two others scripts optimized for Visual Studio Team Services in my GitHub repository.
Prerequirements
First of all I have to say that I used Git repository such source control, but obviously, you are free to use what you prefer, before to start you have to include two files in your SharePoint Framework solution root, that you can find in my GitHub repository:
- VSTS.DeploySPFxToAppCatalog.ps1
- VSTS.DeploySPFxToO365CDN.ps1
Create the build definition
When you create a new build definition there is the possibility to select NodeJS With Gulp (PREVIEW) this represent a shortcut for our goal because we can reuse the tasks or you can also create an empty definition. At the end this will be our build definition:
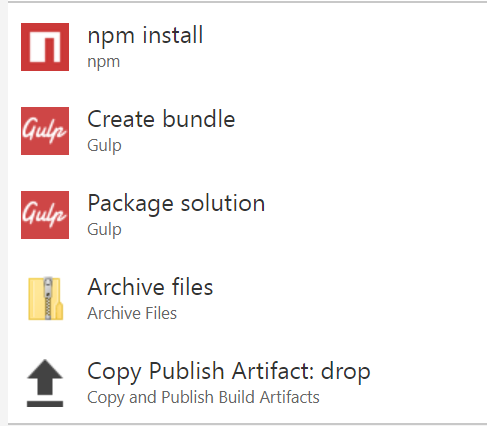
NPM Install
This task as you can presume permit to install all the dependencies:
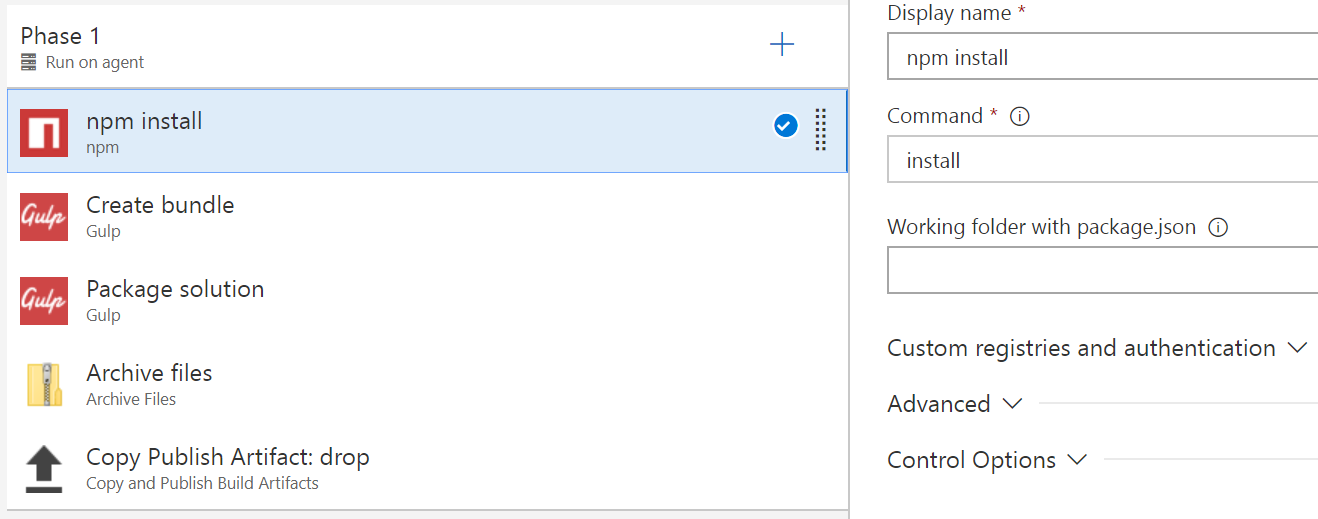
Create the SPFx bundle
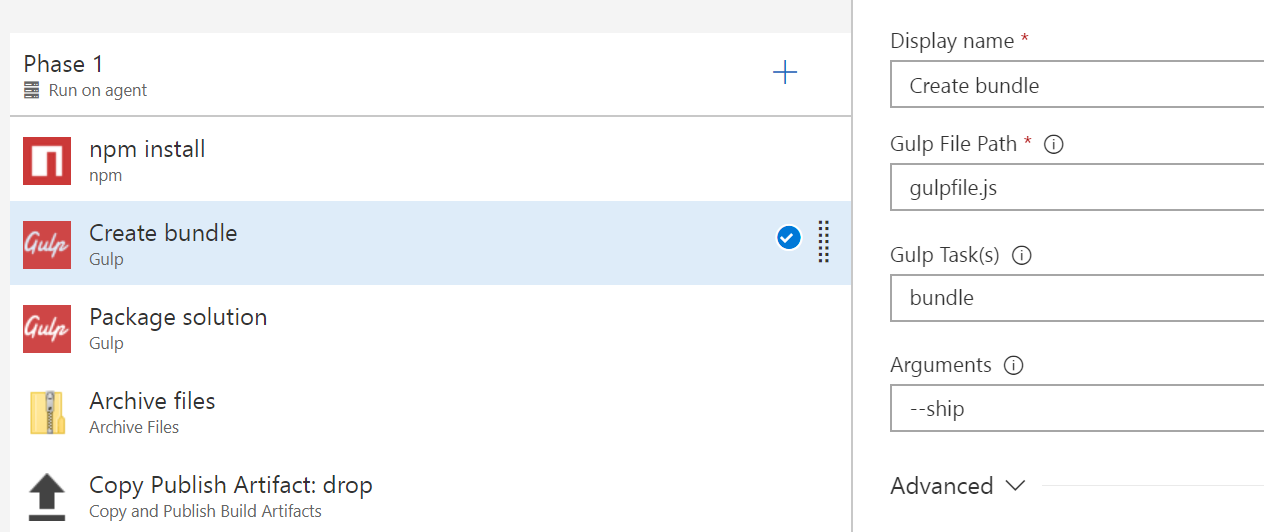
It’s time to specify the path of gulpfile.js passing the argument “–ship” in order to generate the SPFx bundle:
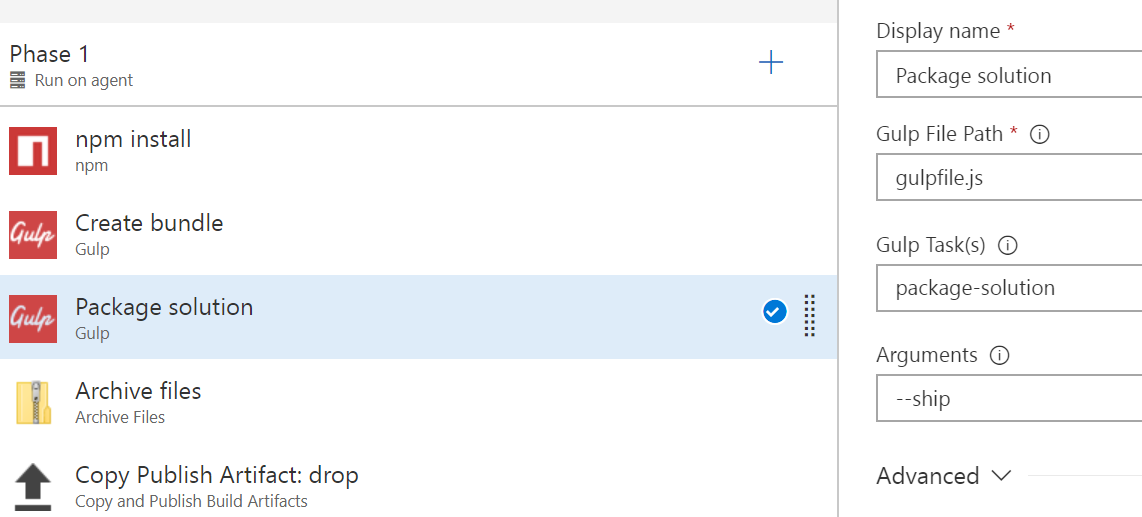
Create the SPFx package
In this task you have to set up the display name, gulp file path, gulp task and arguments:
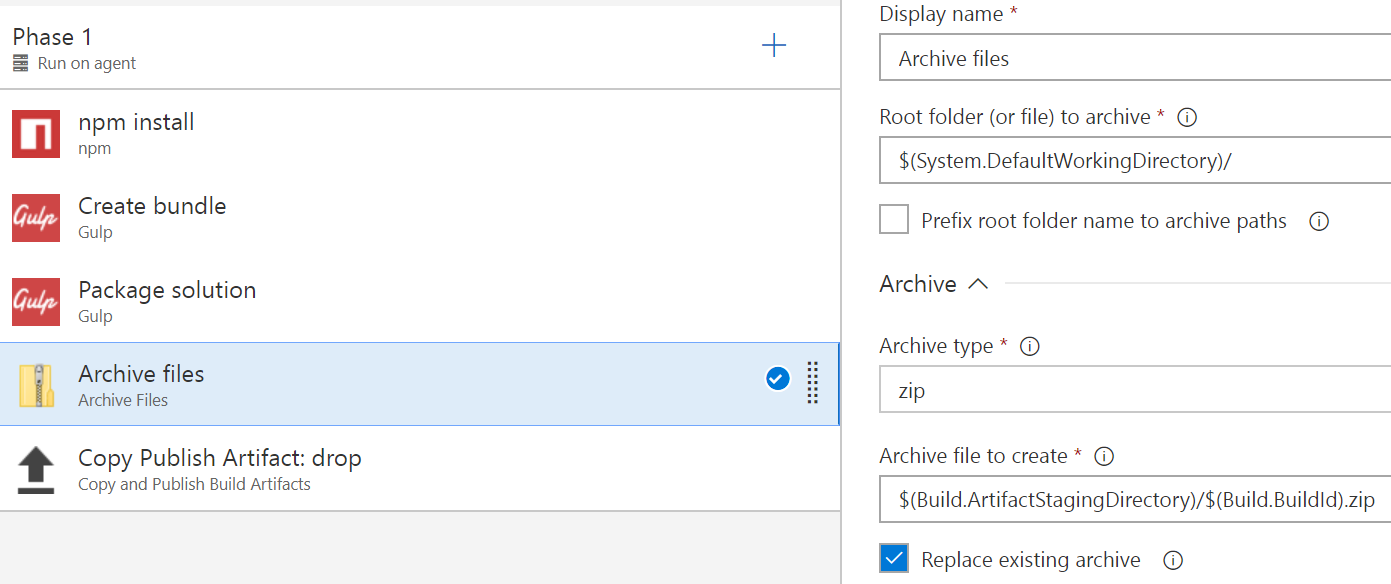
Archive files
This task prepares a zip file before the last step:
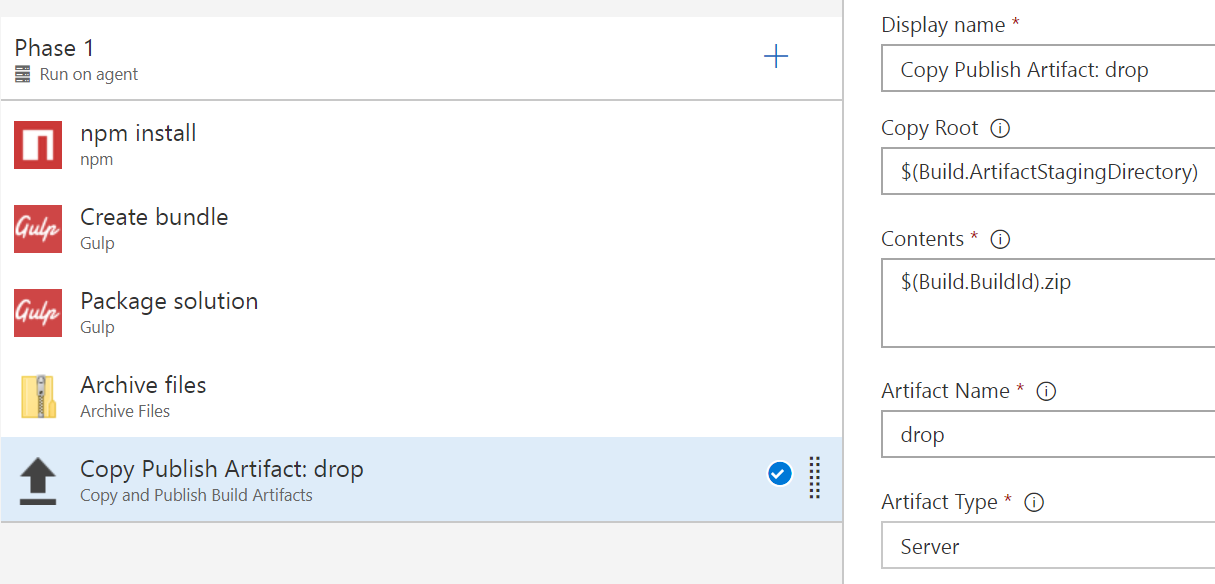
The last task creates a drop artifact:
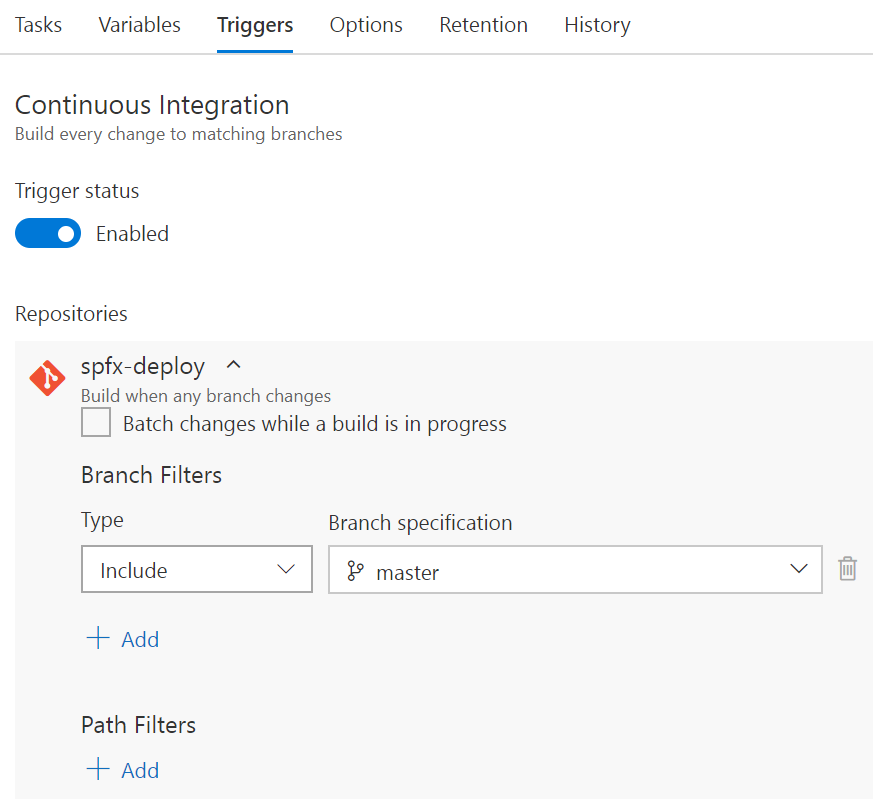
Enable the continuous integration
Go to the “Triggers” tab and enabling the trigger status for configuring the continuous integration properly, this means that, every time the code is pushed, the build will start:
Regarding the agent I used “Hosted” this will be available and selected by default:

The first part of the VSTS configuration is completed, now we can start to create the release definition.
Create the release definition
The release definition is something like that:
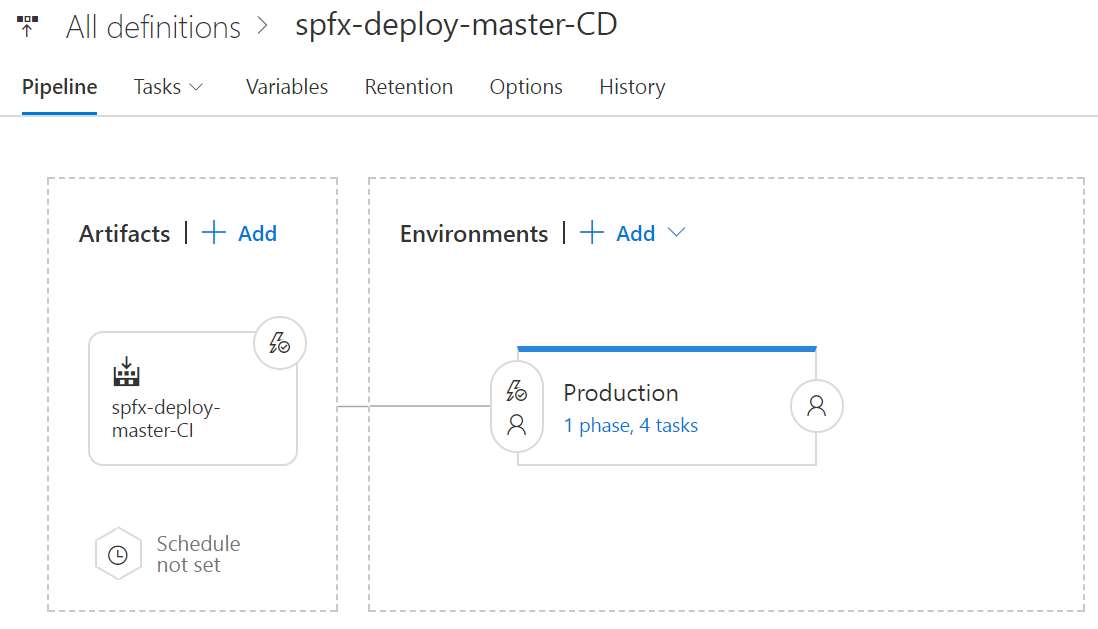
As you can see from the lightning icon, the continuous deployment is enabled allowing to trigger the release every time that the build definition is completed successfully, we have 4 tasks and the environment name is “Production”.
Extract files
Firstly we have to extract the our zip file previously finalized from the build, set up the following parameters “Display name”, “Archive file patterns” with the value */.zip , the “Destination folder” with the value $(System.DefaultWorkingDirectory)/release/ and finally enable the checkbox “Clean destination folder before extracting”:
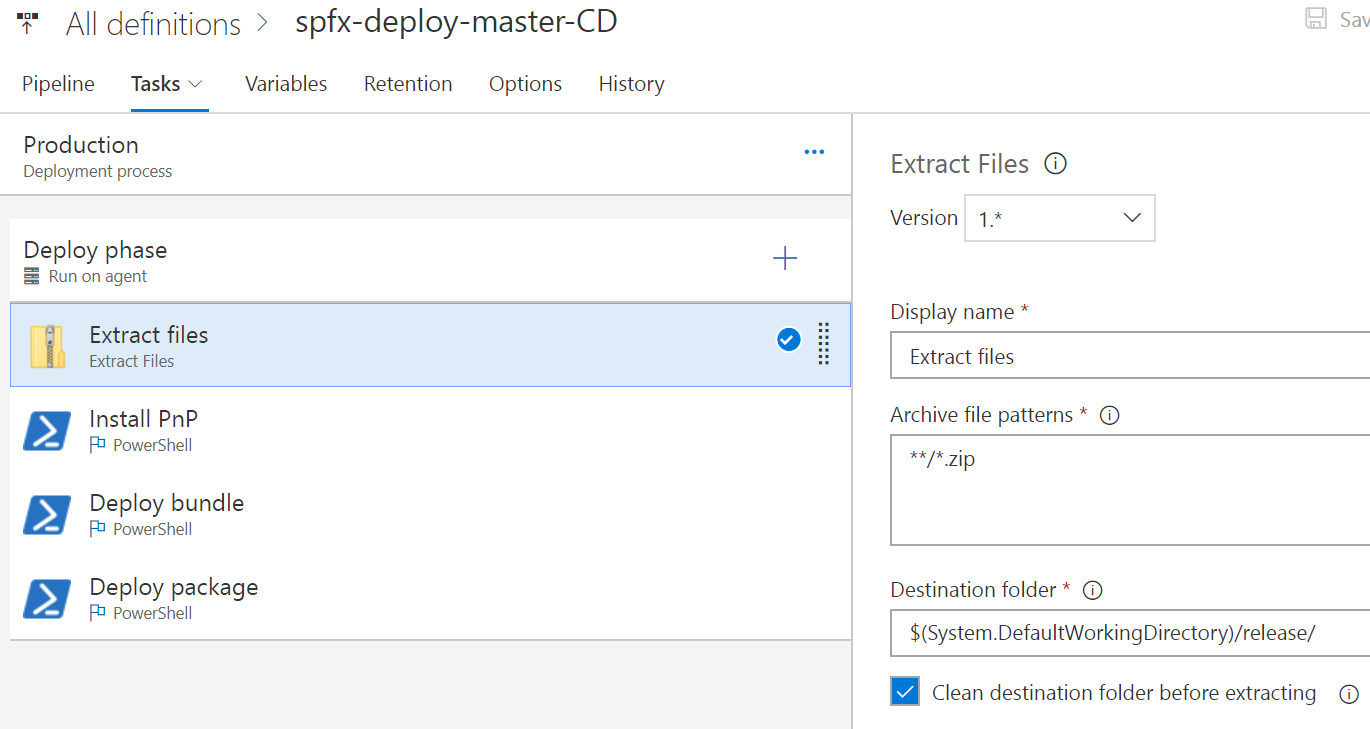
Install PnP Powershell
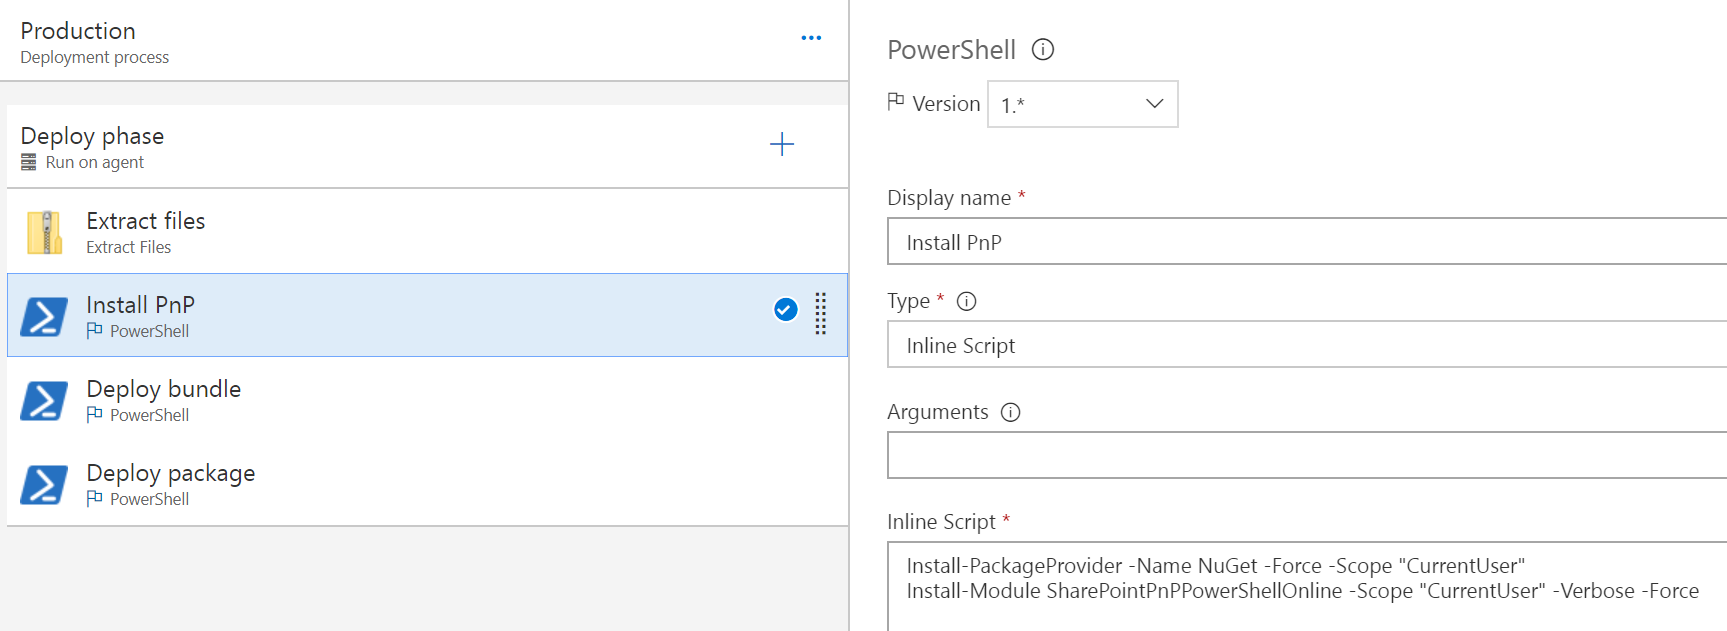
In order to be able to run the Deploy build and Deploy package scripts, we need before to install PnP Powershell during the release, fill out a “Display name”, select Inline Script for “Type” and in the field “Inline Script” insert these two lines of code as described also here:
Install-PackageProvider -Name NuGet -Force -Scope "CurrentUser"
Install-Module SharePointPnPPowerShellOnline -Scope "CurrentUser" -Verbose -Force
Deploy bundle
In this task we make use of the file VSTS.DeploySPFxToO365CDN.ps1 that you can find on my GitHub repository. Fill out the “Display Name”, “Type” with the value File Path, “Script Path” with the value $(System.DefaultWorkingDirectory)/release/VSTS.DeploySPFxToO365CDN.ps1 and finally the last “Arguments” with these parameters -username “$(username)” -psw “$(psw)” -cdnSite “$(cdnSite)” -cdnLib “$(cdnLib)” -releaseFolder “$(releaseFolder)” that we will see later:

Deploy package solution
The last task will run the Powershell file VSTS.DeploySPFxToAppCatalog.ps1, in order to upload and deploy the SSPKG file into the Office 365 app catalog, that file is always available on my GitHub repository. Let’s start filling out the “Display name”, “Type” with the value File Path, “Script Path” with the value $(System.DefaultWorkingDirectory)/release/VSTS.DeploySPFxToAppCatalog.ps1 and as “Arguments” the parameters -username “$(username)” -psw “$(psw)” -catalogSite “$(catalogSite)” -releaseFolder “$(releaseFolder)”

Release definition variables
We have to configure the release definition variables that the Powershell scripts will use as arguments:

Work finished, then it’s time to push your code and looking your build and release process at work.
My solution is available on Github: https://github.com/giuleon/AutomatedDeploymentForSPFx
