Azure DevOps: increase the speed of your SharePoint Framework continuous integration and delivery
- Pipelines
- Boards
- Artifacts
- Repos
- Test Plans
Please take a look at the official Azure blog in order to go deeper.
In this article, I talked about how to configure the continuous integration and delivery for a SharePoint Framework solution. Now I’d like to provide some tip in order to speed up the time during the build and release phase.
Build definition overview
Before to start, I show you how looks like the build and release definition with all tasks:
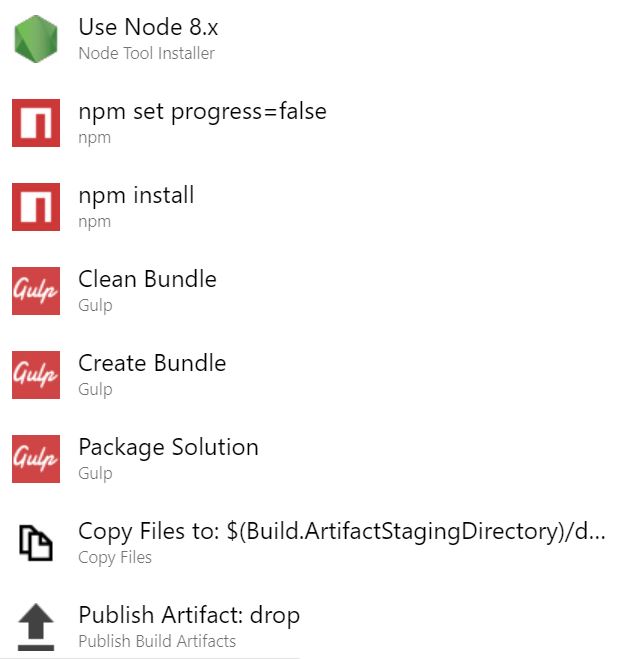
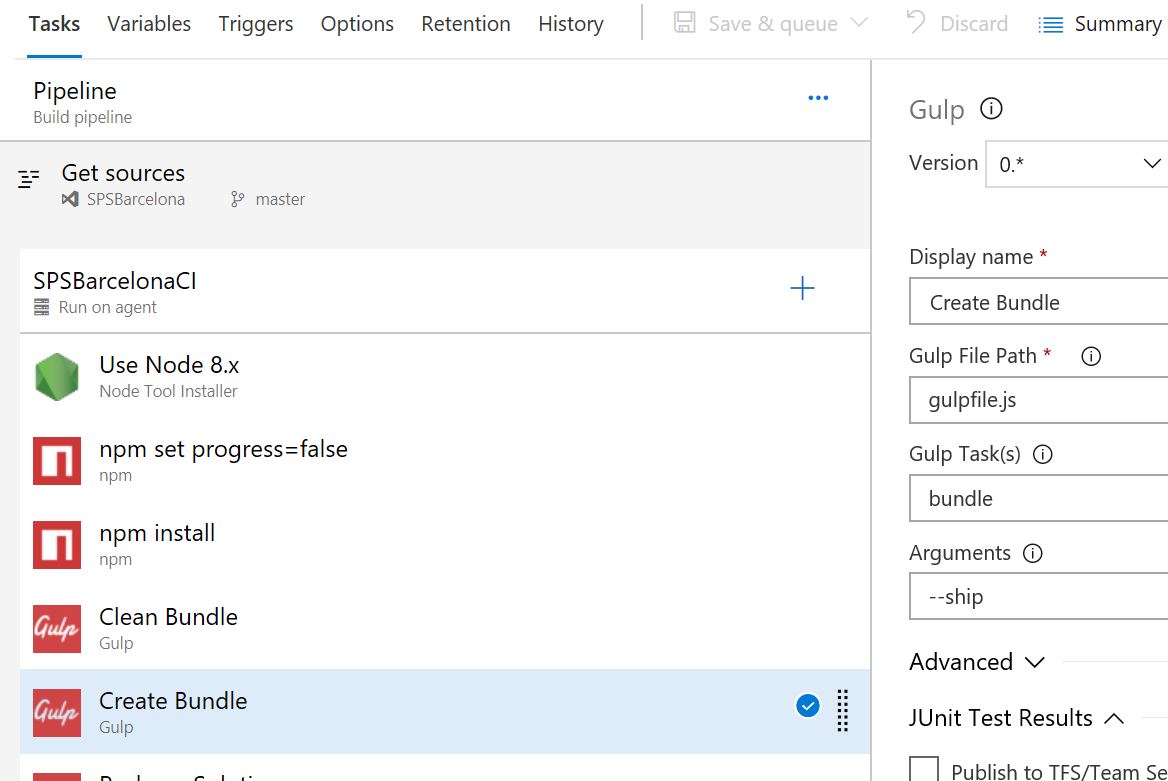
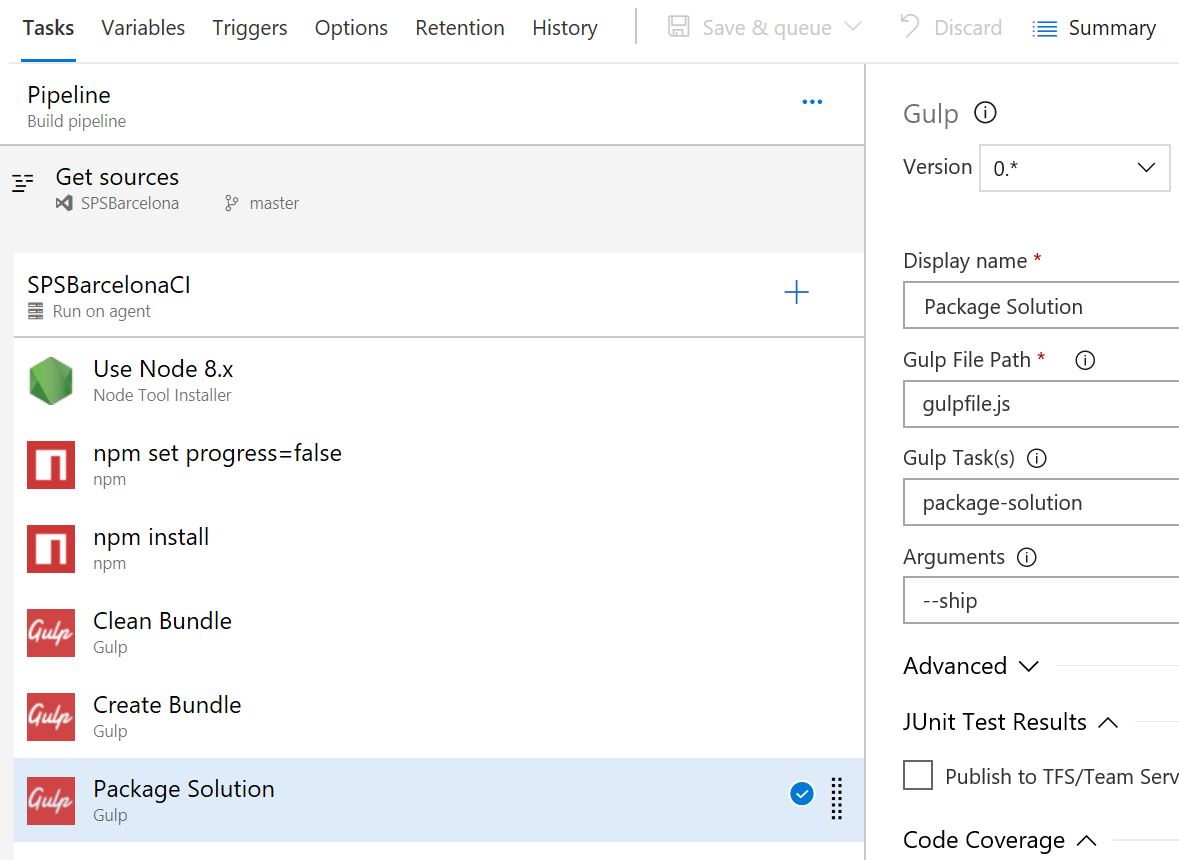
The SharePoint Framework 1.6 has been released, the latter supports Node 8. Starting with this assumption, I defined the installation of Node 8.x as the first step, in fact, this will increase the velocity during the command “NPM Install”. Normally when we run the command NPM install locally without errors, there are good probabilities that this command will succeed on Azure DevOps build as well. Considering that, we can disable the log during the “NPM install” by creating the task “NPM set progress=false”, this will make us earn about 40 seconds. Then we have the classic tasks to build and package a SharePoint Framework solution:
- Npm Install
- Clean Bundle
- Create Bundle
- Package Solution
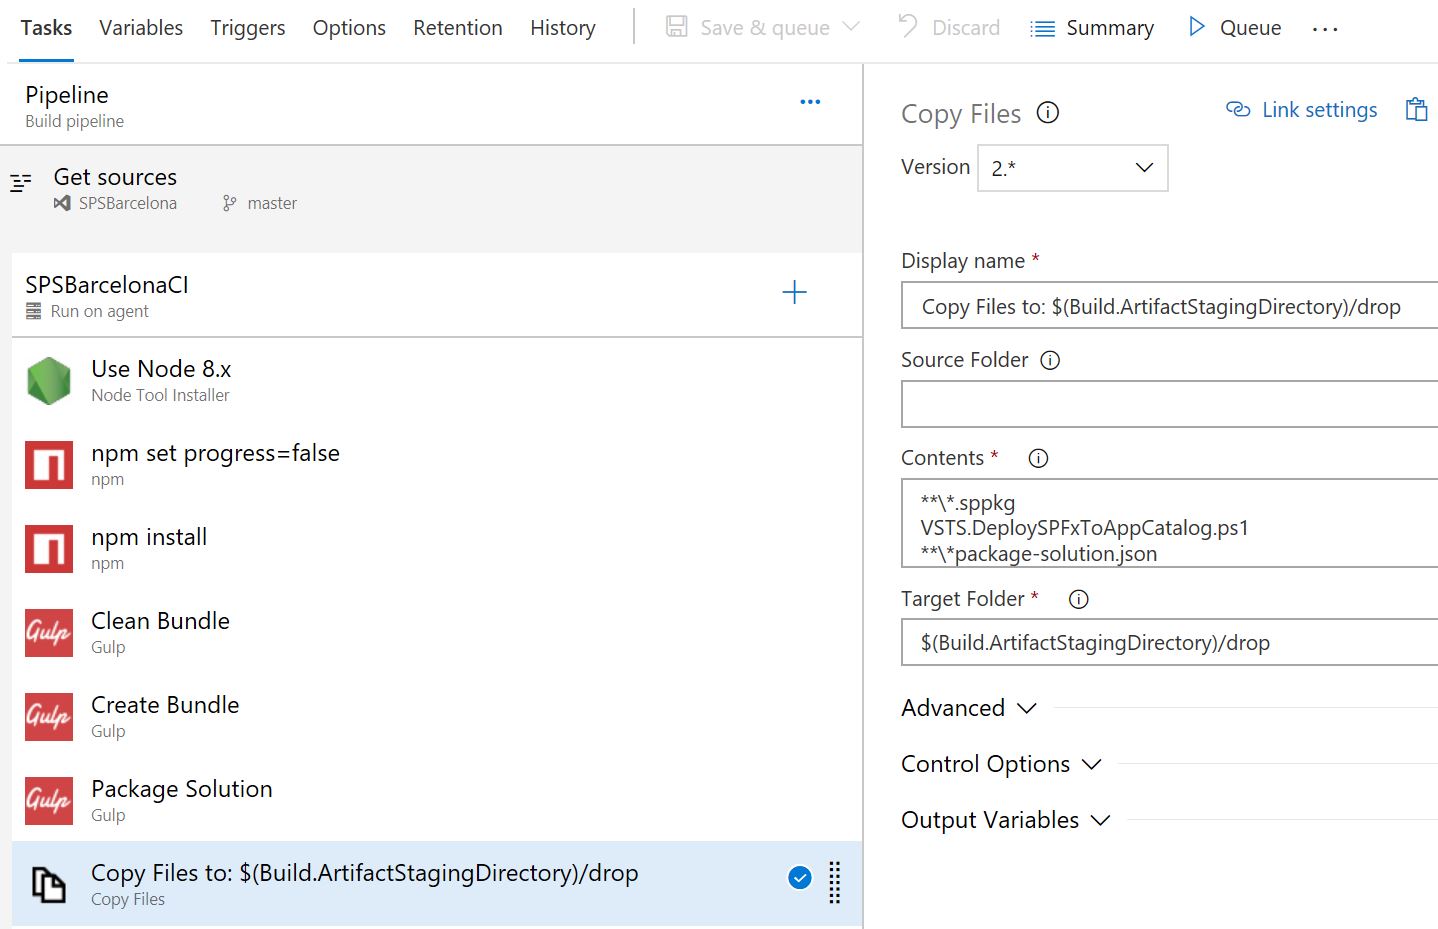
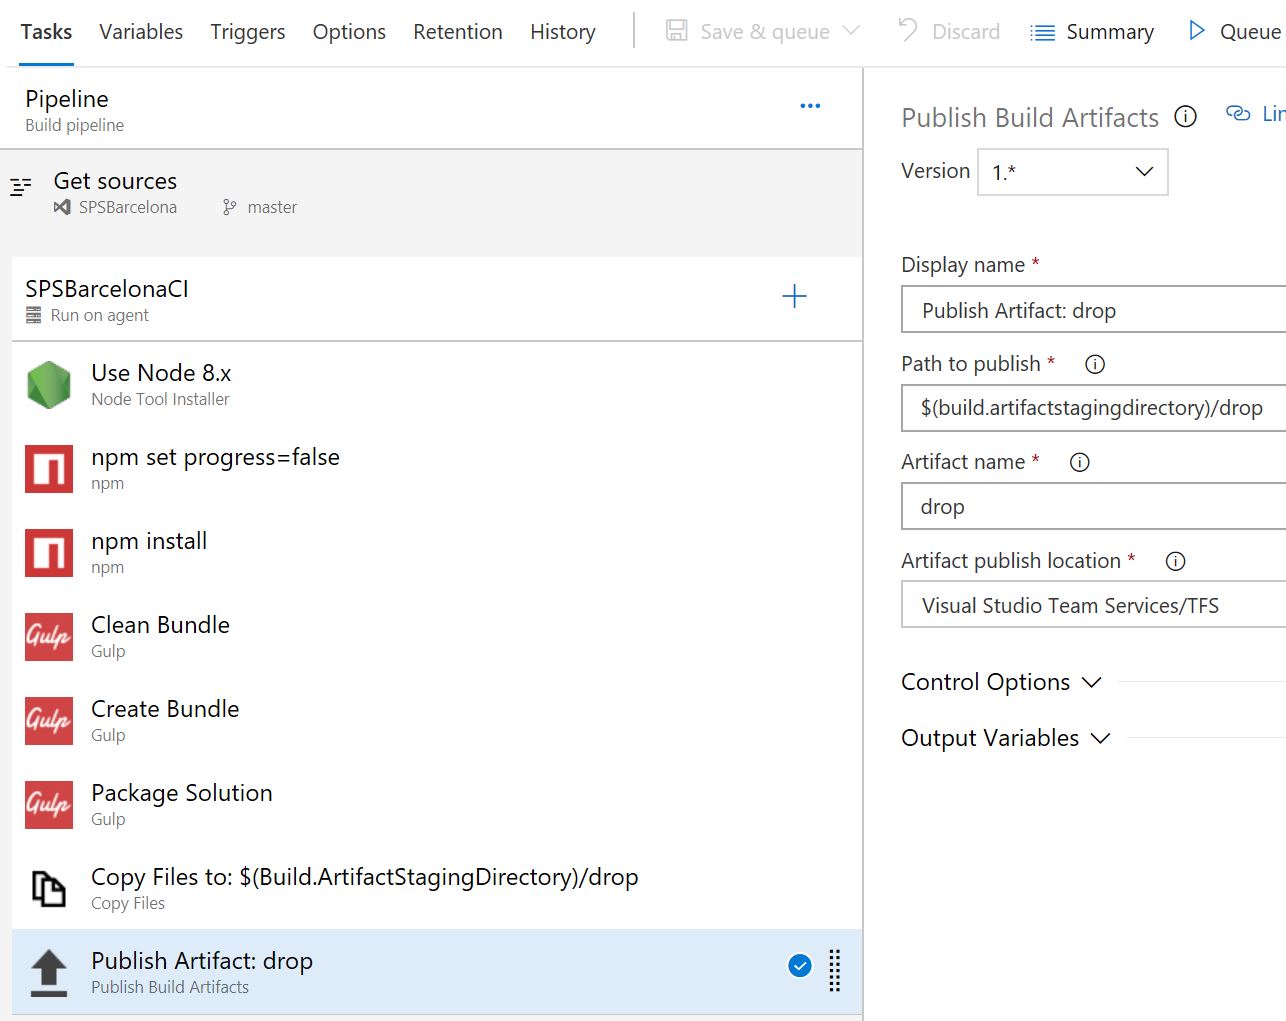
It’s time to finalize the build by copying the files and publishing the artifact. All we need are the following files SPPKG, package-solution.json, VSTS.DeploySPFxToAppCatalog.ps1. The first one is necessary in order to deploy the solution in the App Catalog. If you decide to adopt the release across Powershell you need to include the package-solution.json to read parameters like “includeClientSideAssets, zippedPackage, skipFeatureDeployment”. Finally, the last one (VSTS.DeploySPFxToAppCatalog.ps1) that you can include in your solution with the Powershell command:
Save-Script -Name VSTS.DeploySPFxToAppCatalog -Path <root SPFx path>
This script will help you to automate the deploy, we will see it later (more info are available on my GitHub repo). The total duration of my build is:

Below every steps for the build definition:
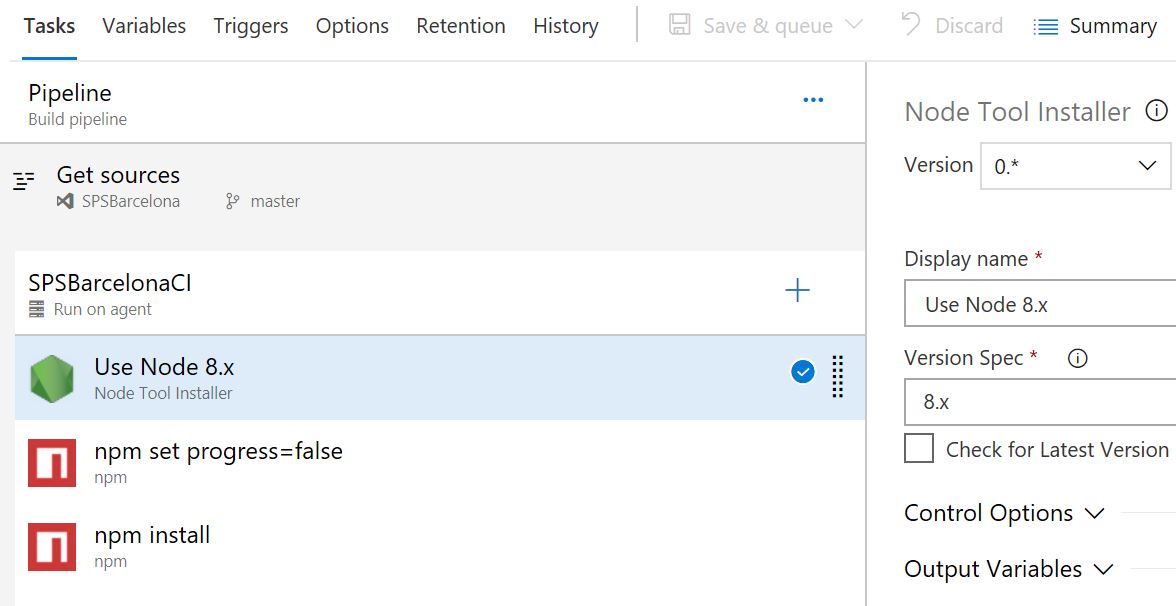
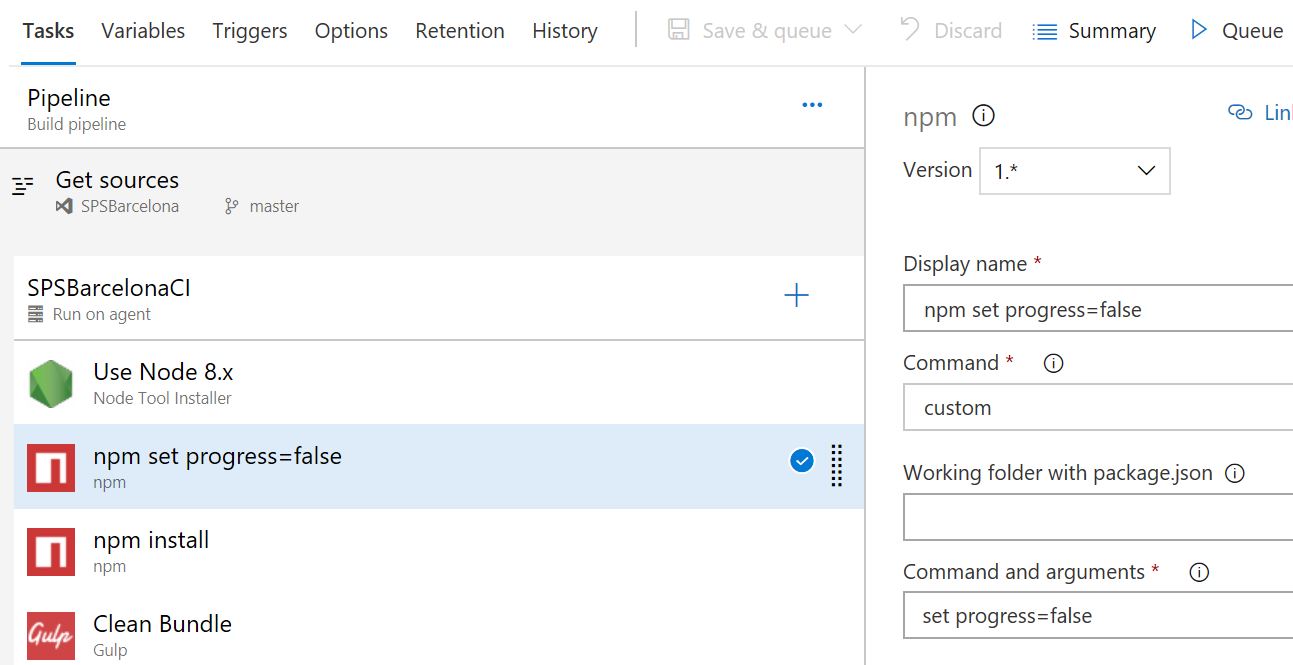
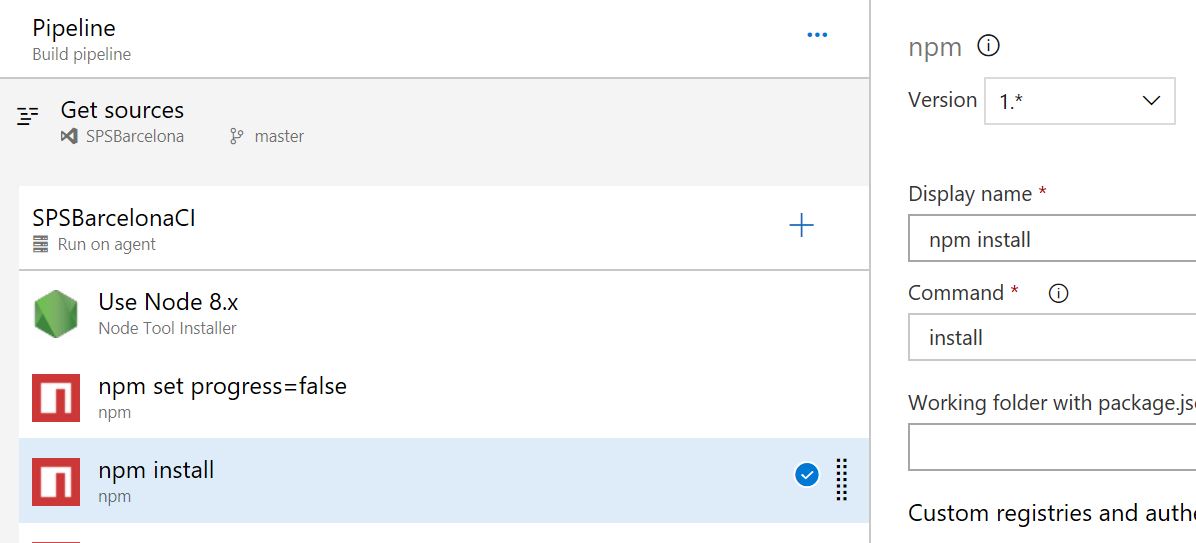
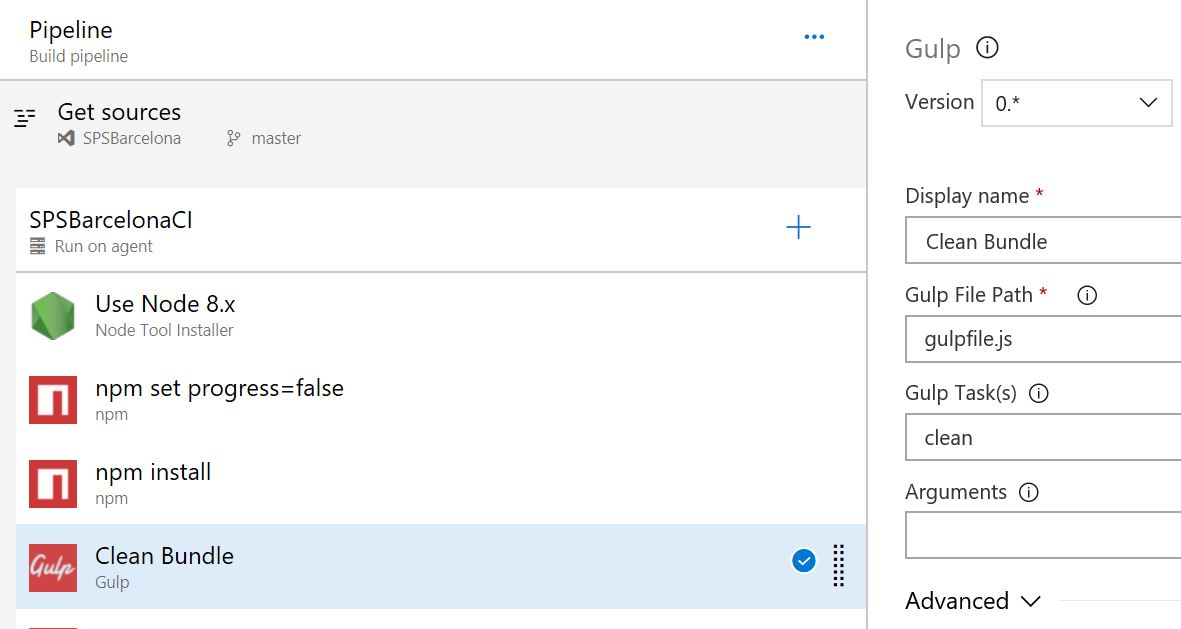
Release definition overview
The release definition offers several possibilities of usage. In fact, we can use different approaches:
- Gulp (take a look to the Elio Struyf's solution)
- Office 365 CLI
- Powershell
I’ll show you two scenarios with Office 365 CLI and Powershell. Before to start with the second scenario, remember to use Office 365 CLI at least one time on your tenant. It’s necessary to grant the permissions to this amazing cross-platform tool in order to use it, as explained by Waldek Mastykarz in this article:
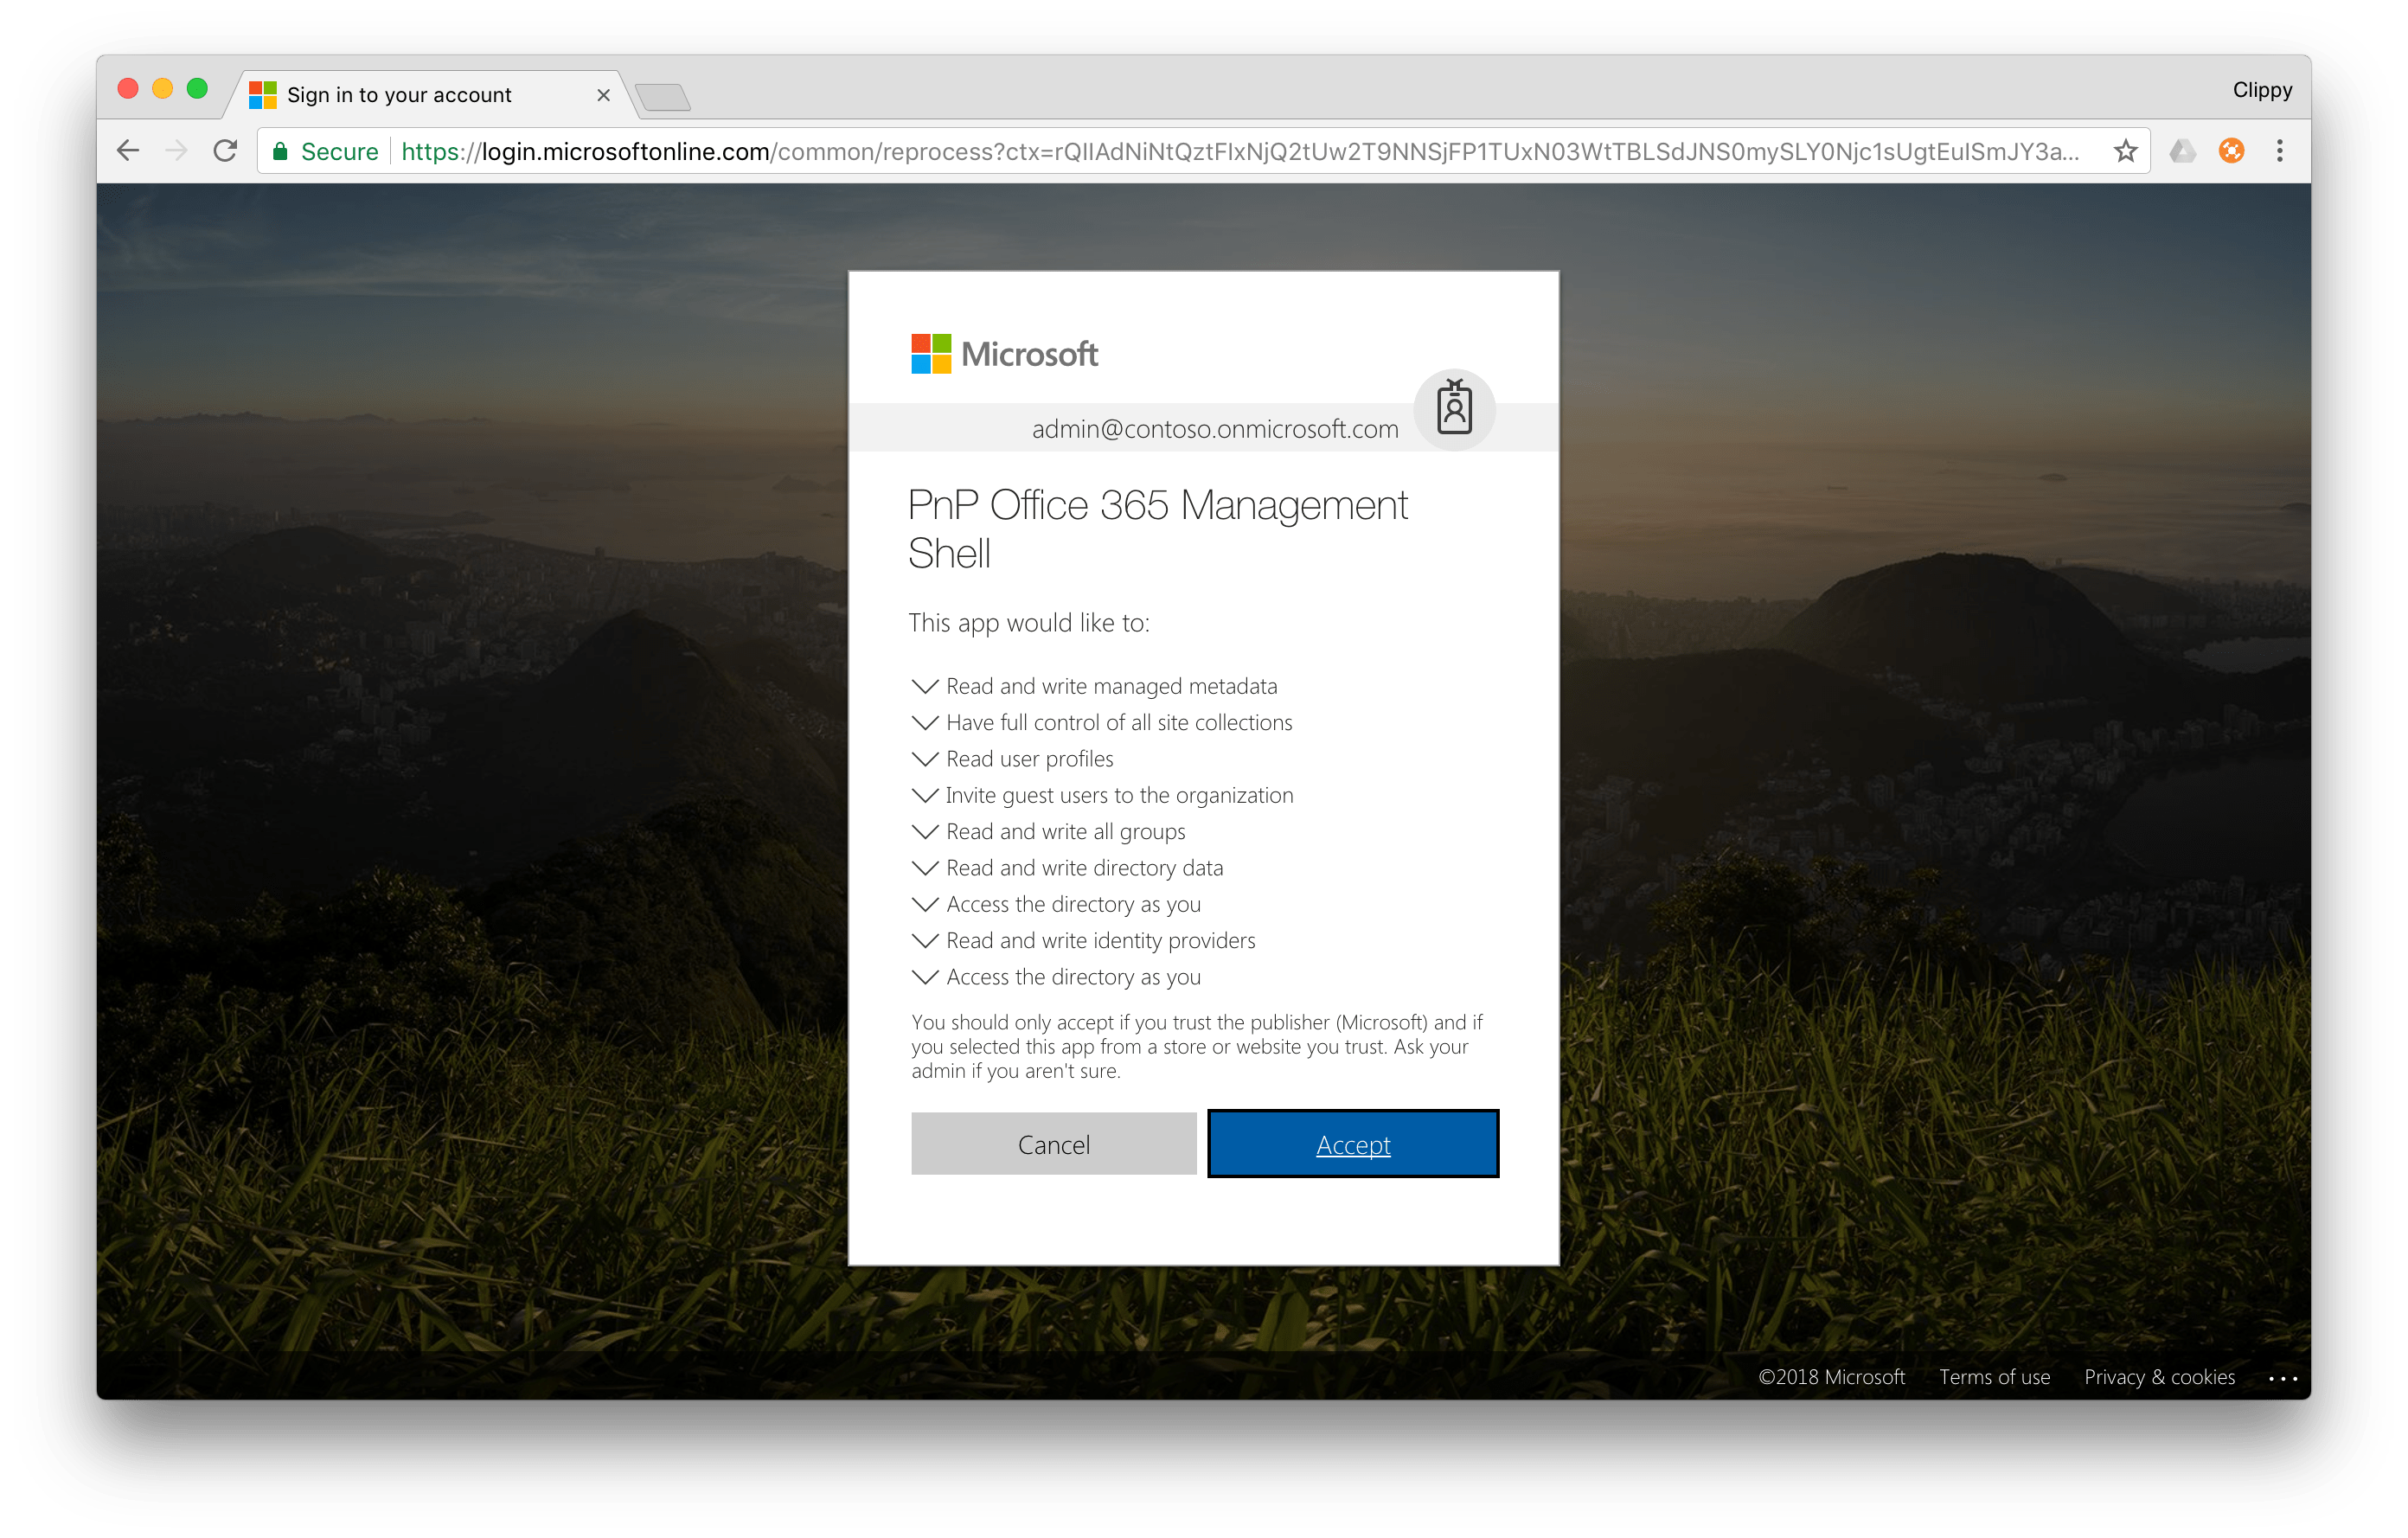
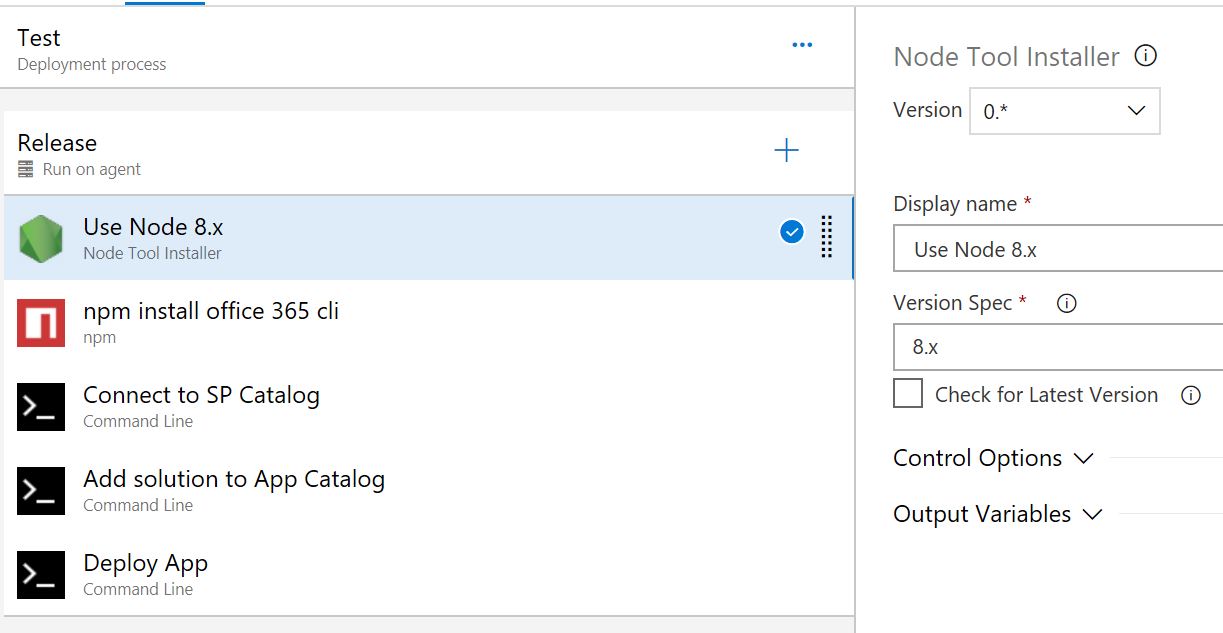
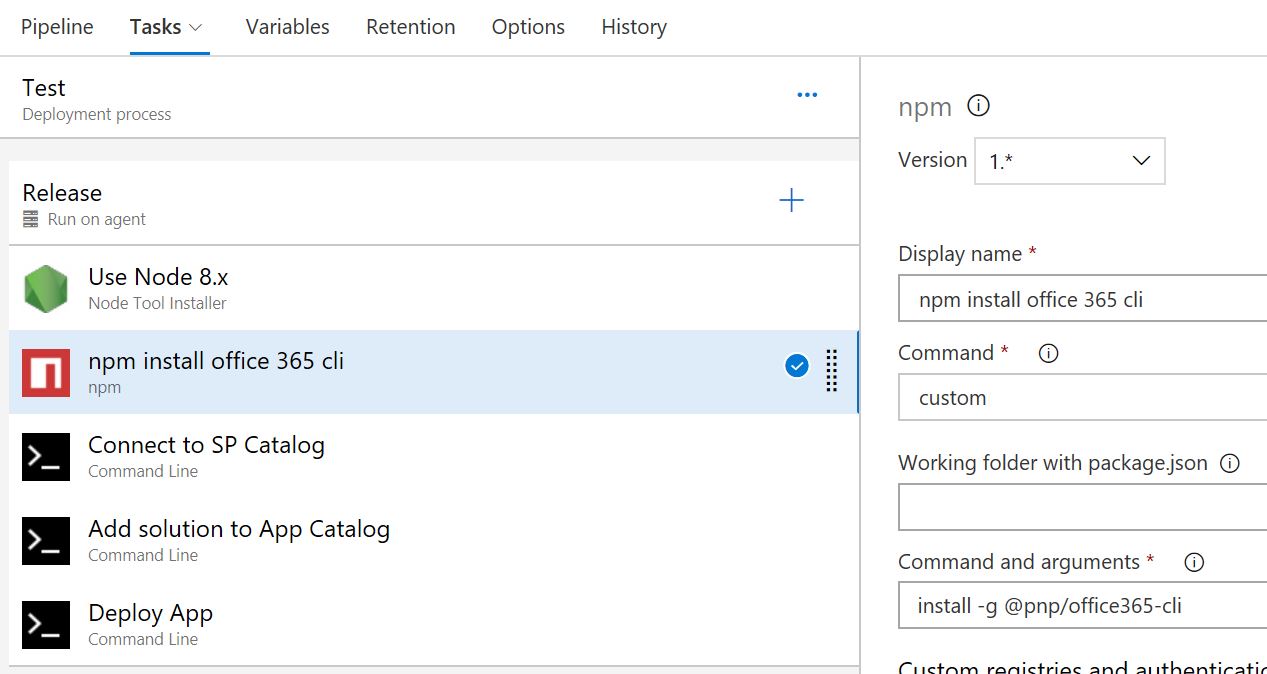
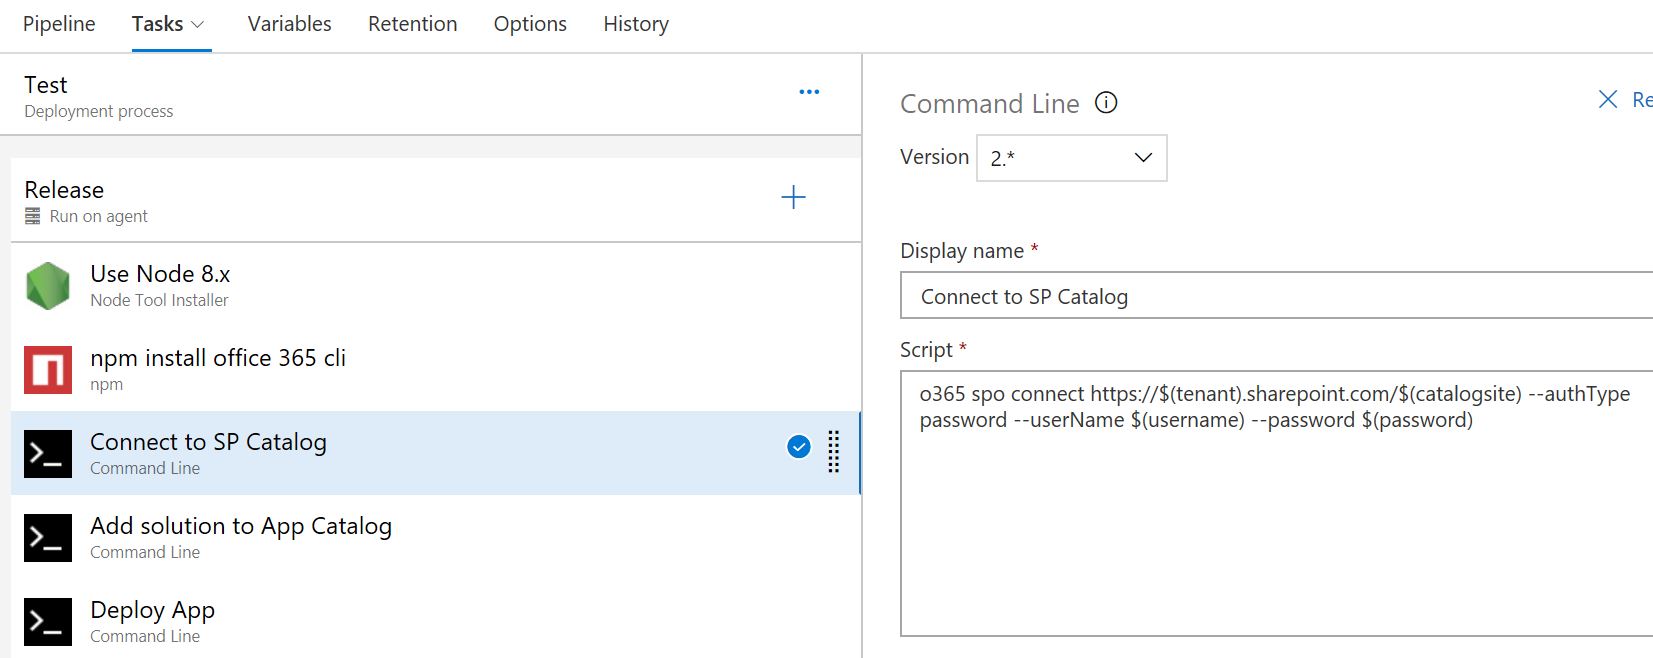
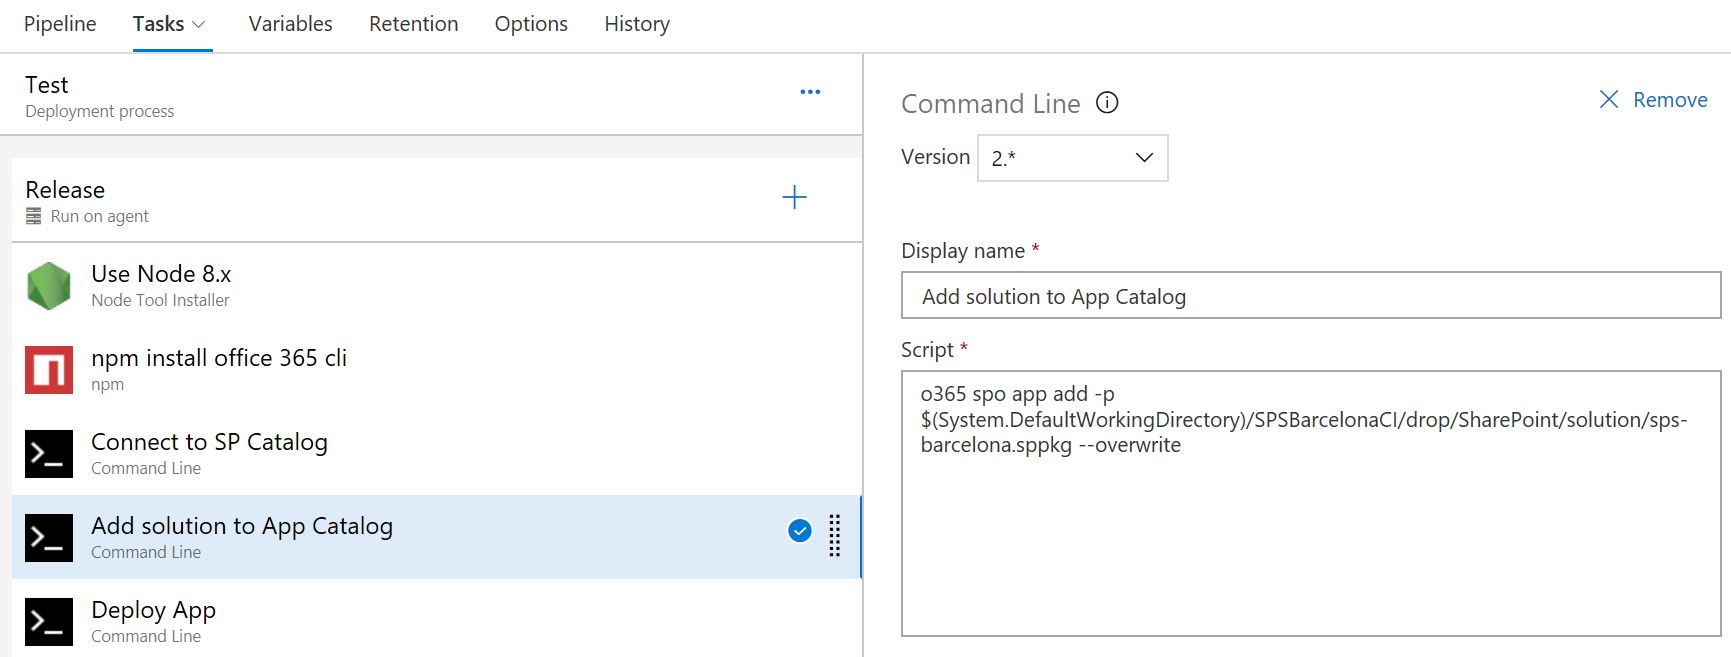
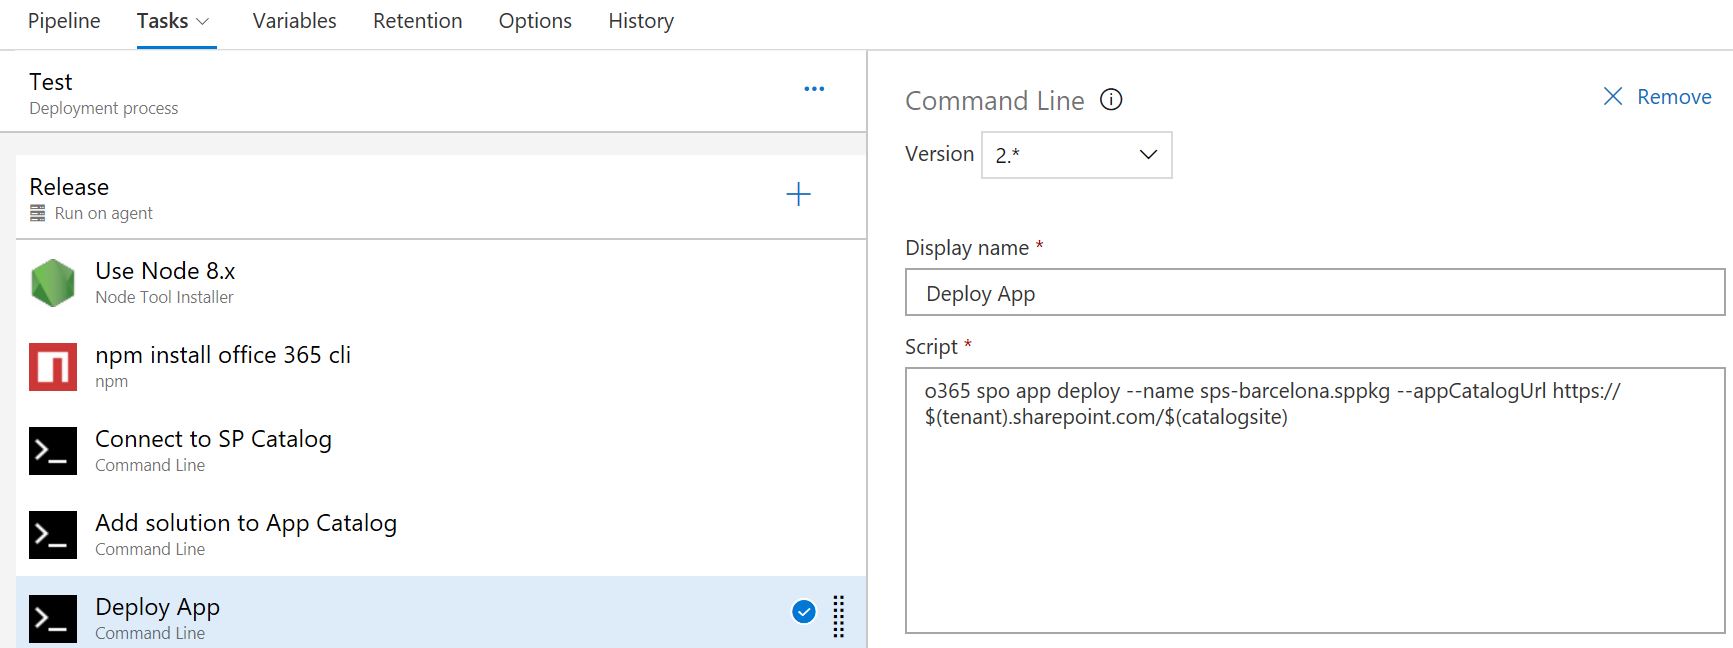
Once granted the permissions we can start to configure the release definition that will be something like that:
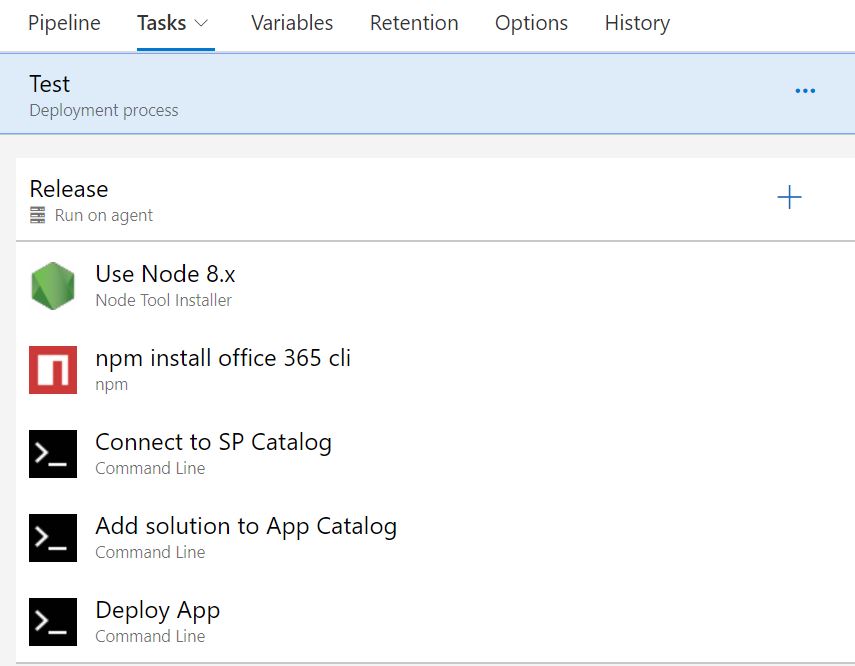
Here the result:

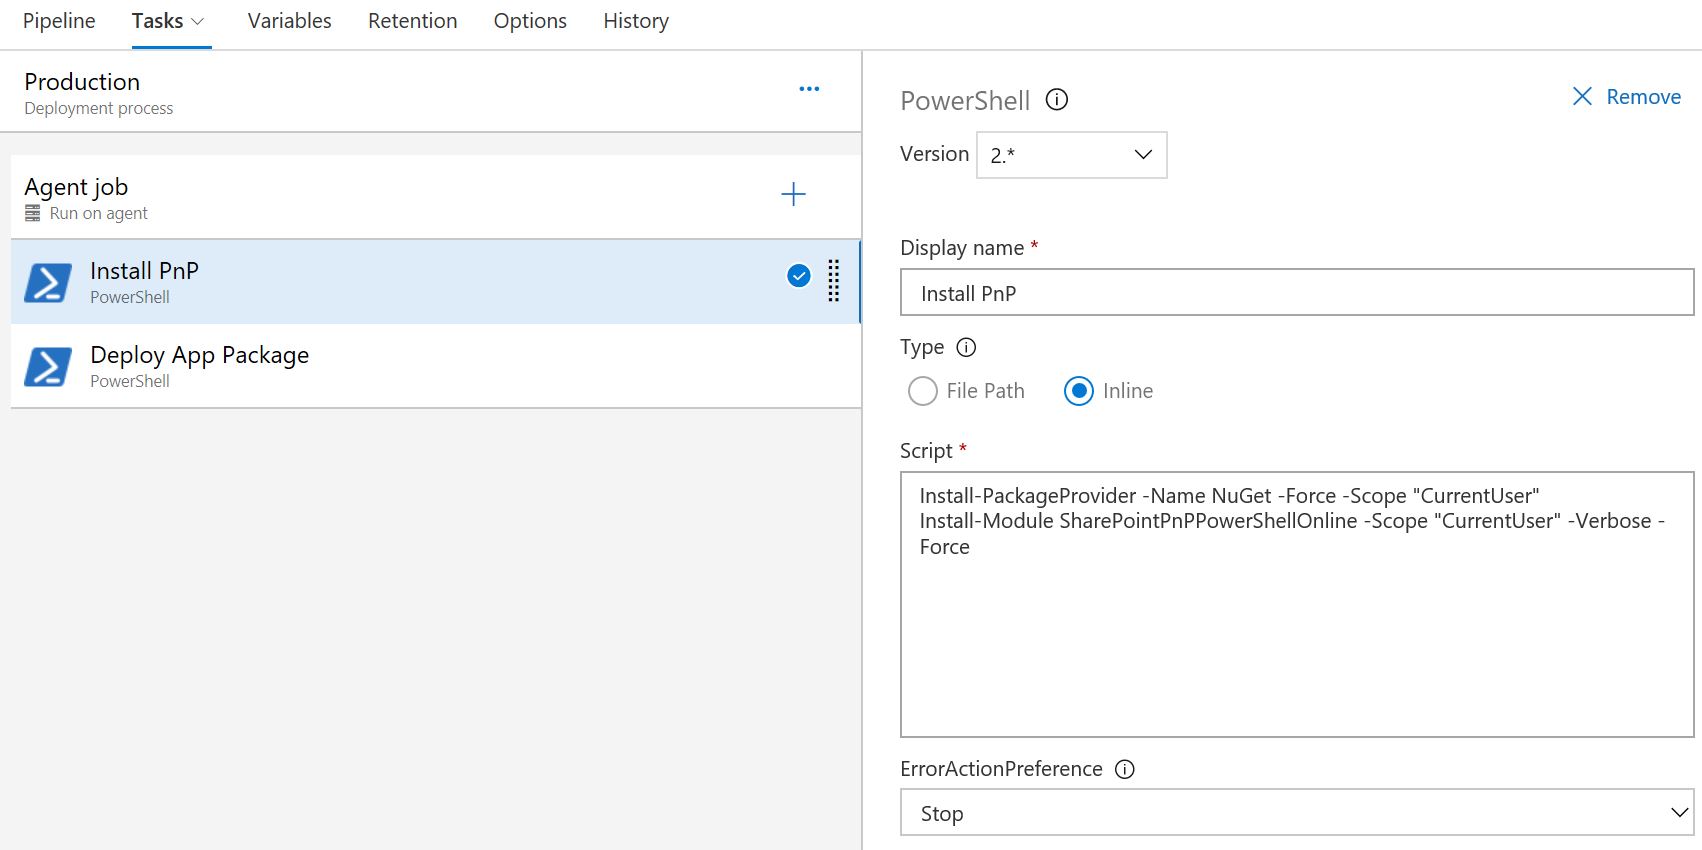
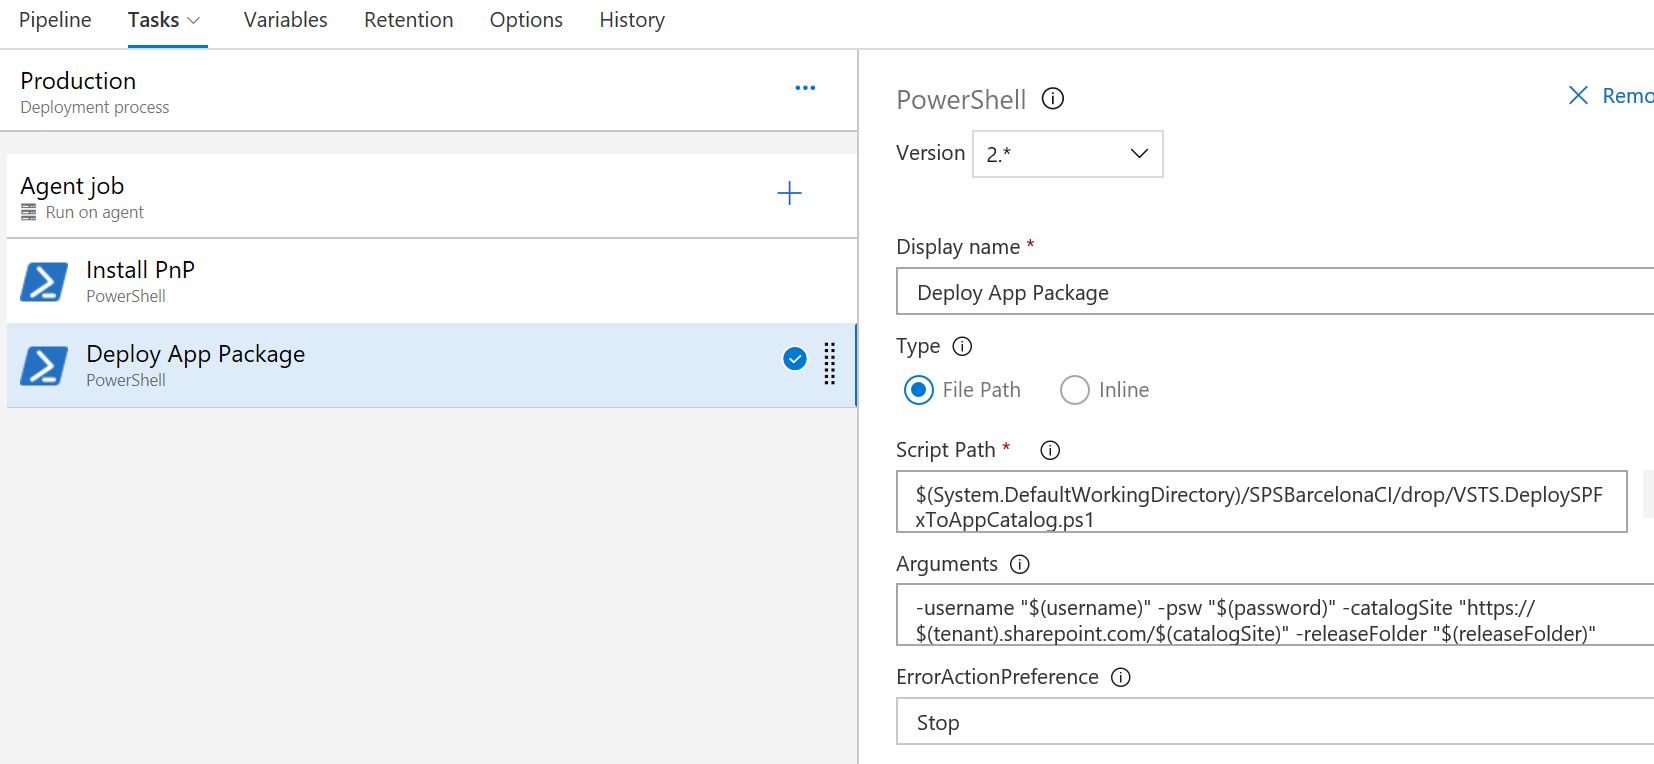
Regarding the other approach with Powershell, I can say that is fastest, but can only be adopted if you are using a Windows environment:
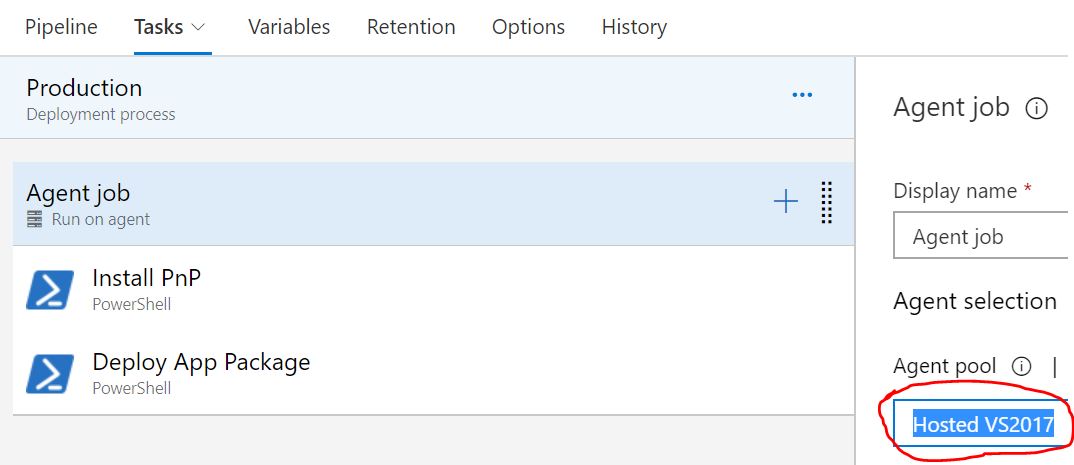
As you can see we have only two tasks, with the first is possible to install PnP Powershell with the second I’m going to deploy the sppkg file to the App Catalog by following the instructions in the file package-solution.json.
Here you can see the result:

Both scenarios are valid, therefore feel free to use what you prefer.
Below every single steps for the release definition:
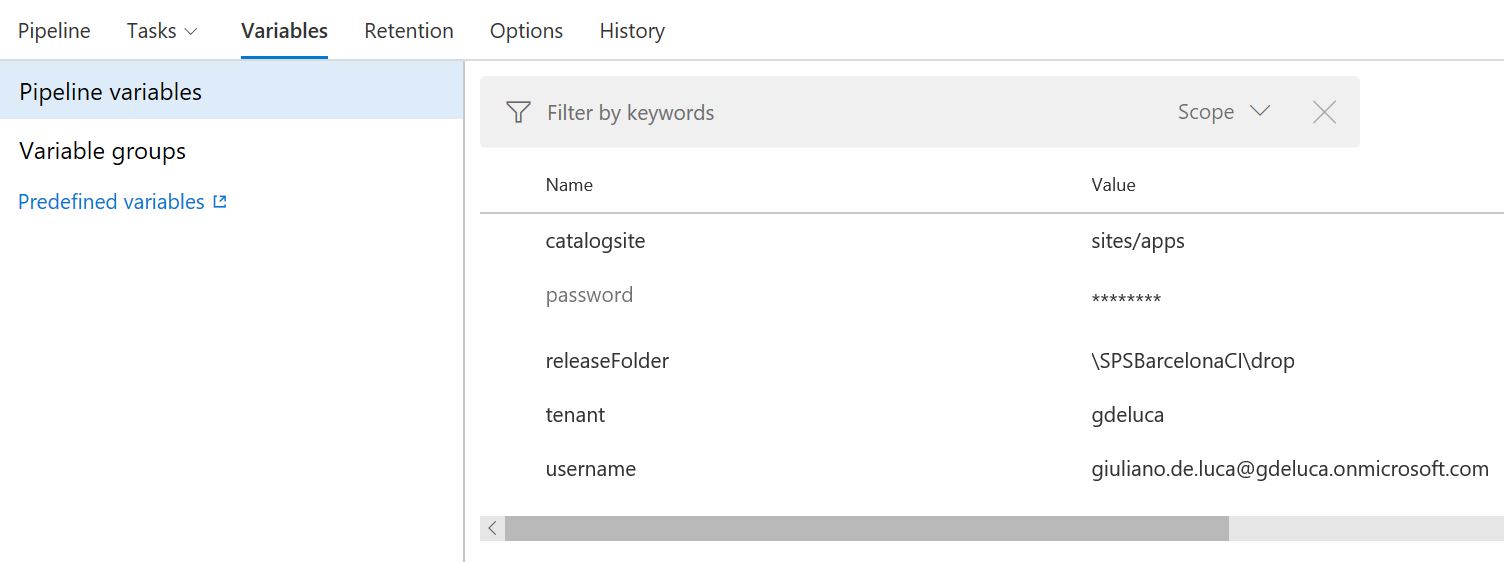
O365 CLI Release Definition:
PnP Release Definition:
